 STOIK
The hips fix.
Four moves. Four weeks. Then you test again.
A floor, a pad for your knee, and a resistance band.
SOMETHING UP FRONT IS TIGHT.
When you rolled back, your thigh floated up, your knee kicked out, or both. Thigh floating up means the front of your hip is tight, your hip flexors. Knee kicking out means the front of your thigh is tight, the muscle that runs from your hip to your knee.
Tight is usually not the whole story. When we see this in the studio, we check four things: how far the hip moves, whether your core can hold your pelvis still, whether your glutes are strong enough to open the hip, and whether it all holds up when you're standing. These four moves work all four, one each.
About fifteen minutes, two or three days a week, plus a quick stretch on the days in between. Nothing here should hurt.
DO THEM IN THIS ORDER.
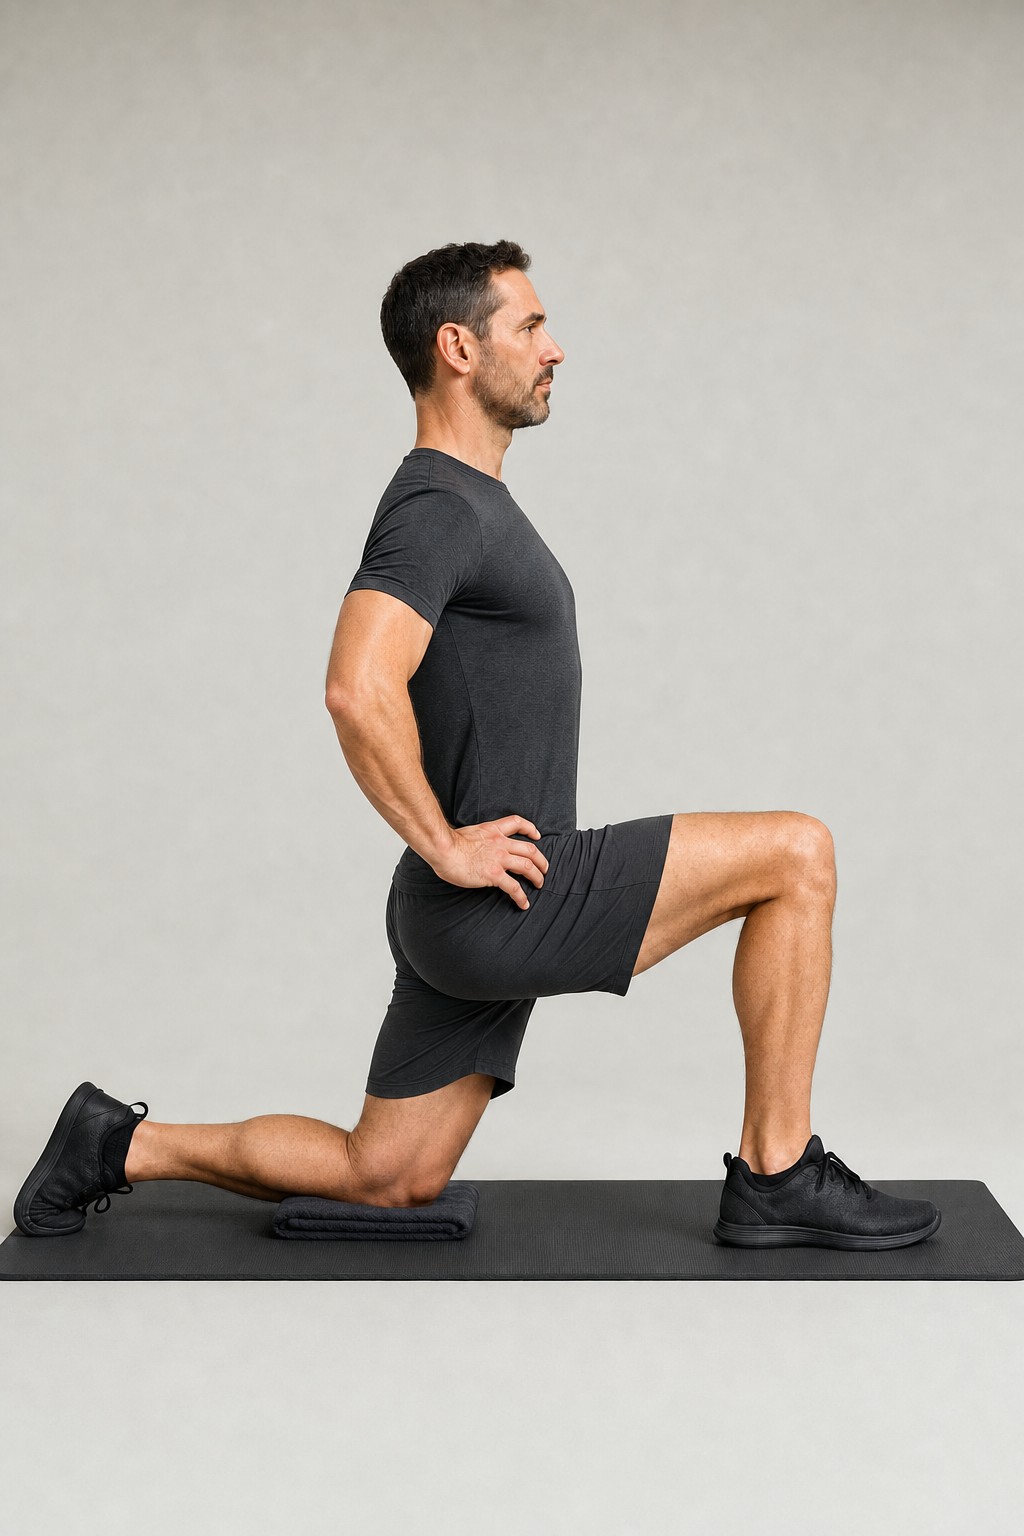
HALF KNEELING HIP FLEXOR STRETCH
MOBILITY. Opens the front of the hip. HowHalf kneeling, back knee down on a pad, front foot flat with the knee over the ankle. Tuck your pelvis under (tip your belt buckle up toward your ribs), then shift your hips forward without leaning. Hold, or rock slowly in and out.
Don'tLet your low back arch. Lean your whole body forward instead of driving the hip.
You should feelA stretch across the front of the back hip. Easy effort. It should never hurt.
Knee kicked out on the test?Do the couch stretch version: back to a wall or the couch, slide the back shin up it, same tuck, same forward shift. You'll feel it down the front of the thigh too. Skip either one if kneeling hurts your knee.
DEAD BUG
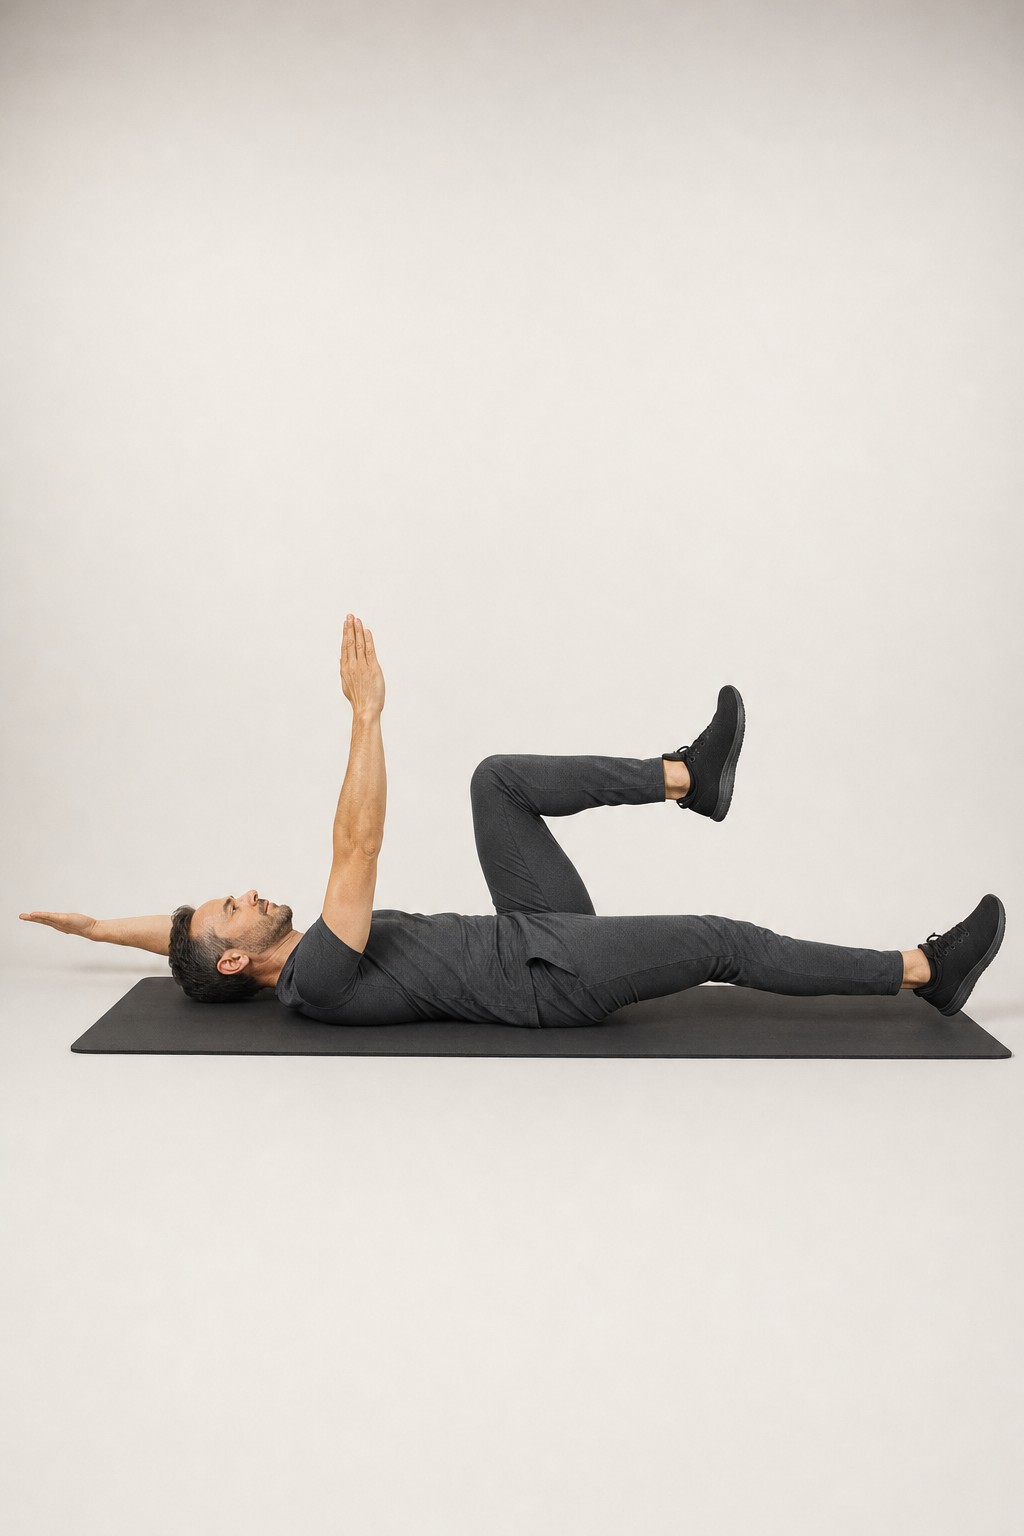
CONTROL. Keeps your pelvis still. HowOn your back, arms straight up, knees bent to ninety over your hips. Flatten your low back to the floor and keep it there. Slowly reach one arm overhead and the opposite leg out long, breathing out, then bring them back. Switch sides. Only reach as far as your back stays flat.
Don'tTwist as the arm and leg go out. Let your low back lift off the floor. Rush it.
You should feelYour abs working to keep your back flat. The set is over when your back starts to lift, even if you haven't hit the number.
Too much?Keep the knee bent and just tap that heel to the floor.
GLUTE BRIDGE
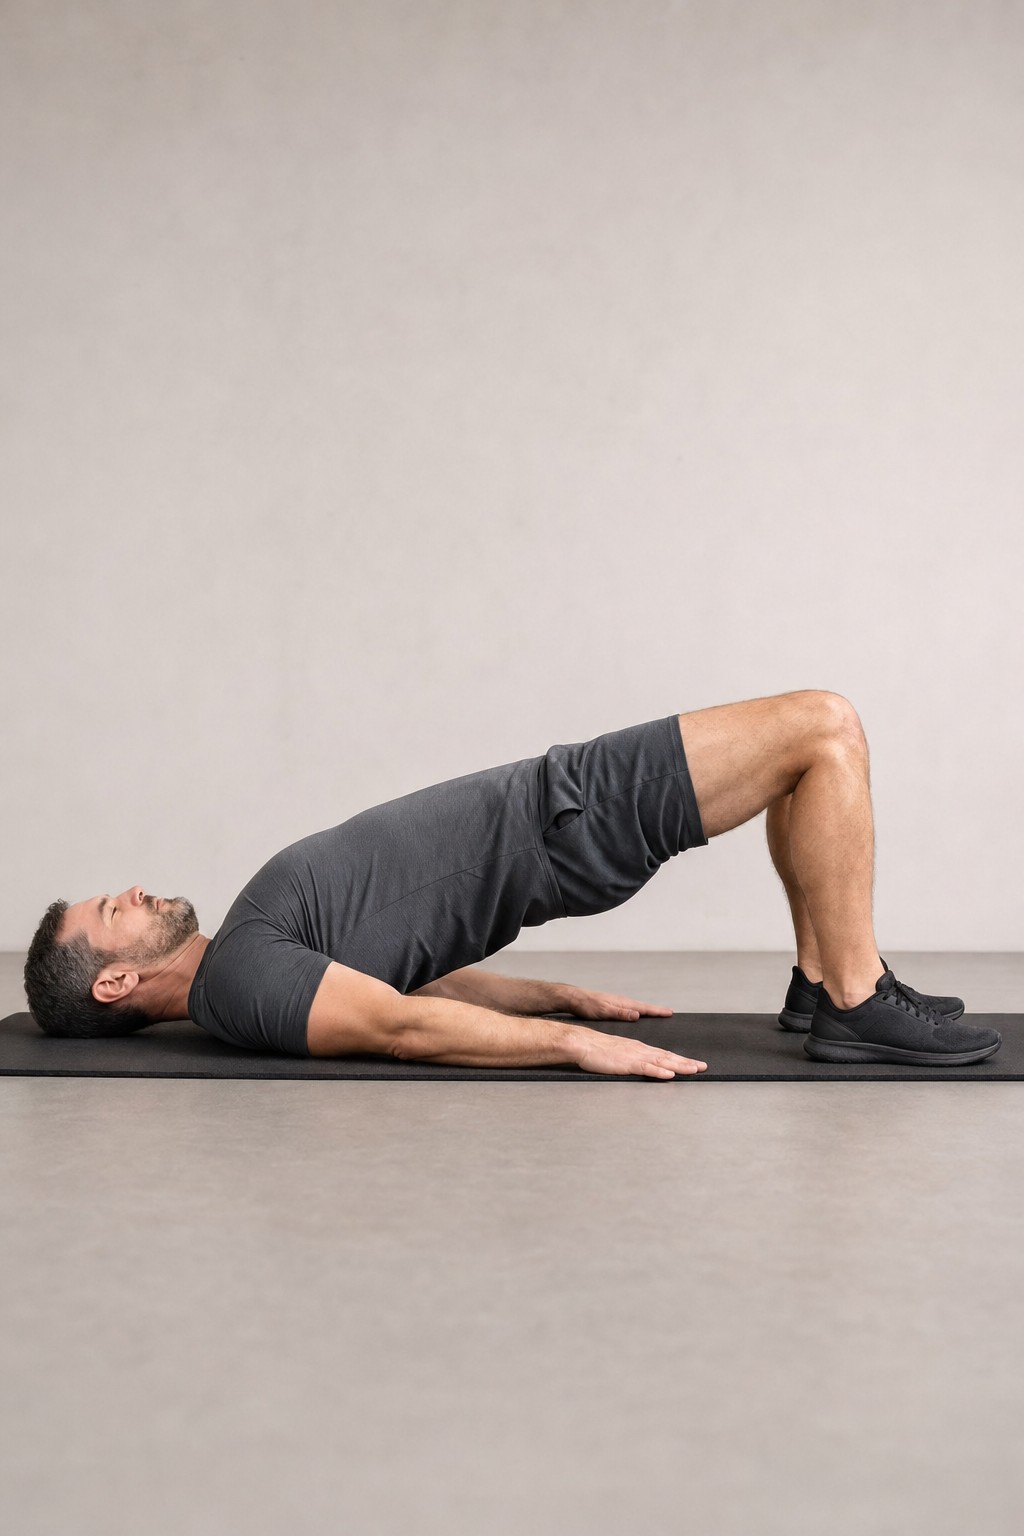
STRENGTH. Gets your glutes opening the hip. HowOn your back, knees bent, feet flat. Drive through your heels and lift your hips. Squeeze your glutes at the top. Keep your spine neutral.
Don'tArch your low back. Stop short of a straight line from shoulders to knees. Set your feet too far away. Let your knees cave in.
You should feelYour glutes doing the work, not your low back. The last few reps of each set should feel hard.
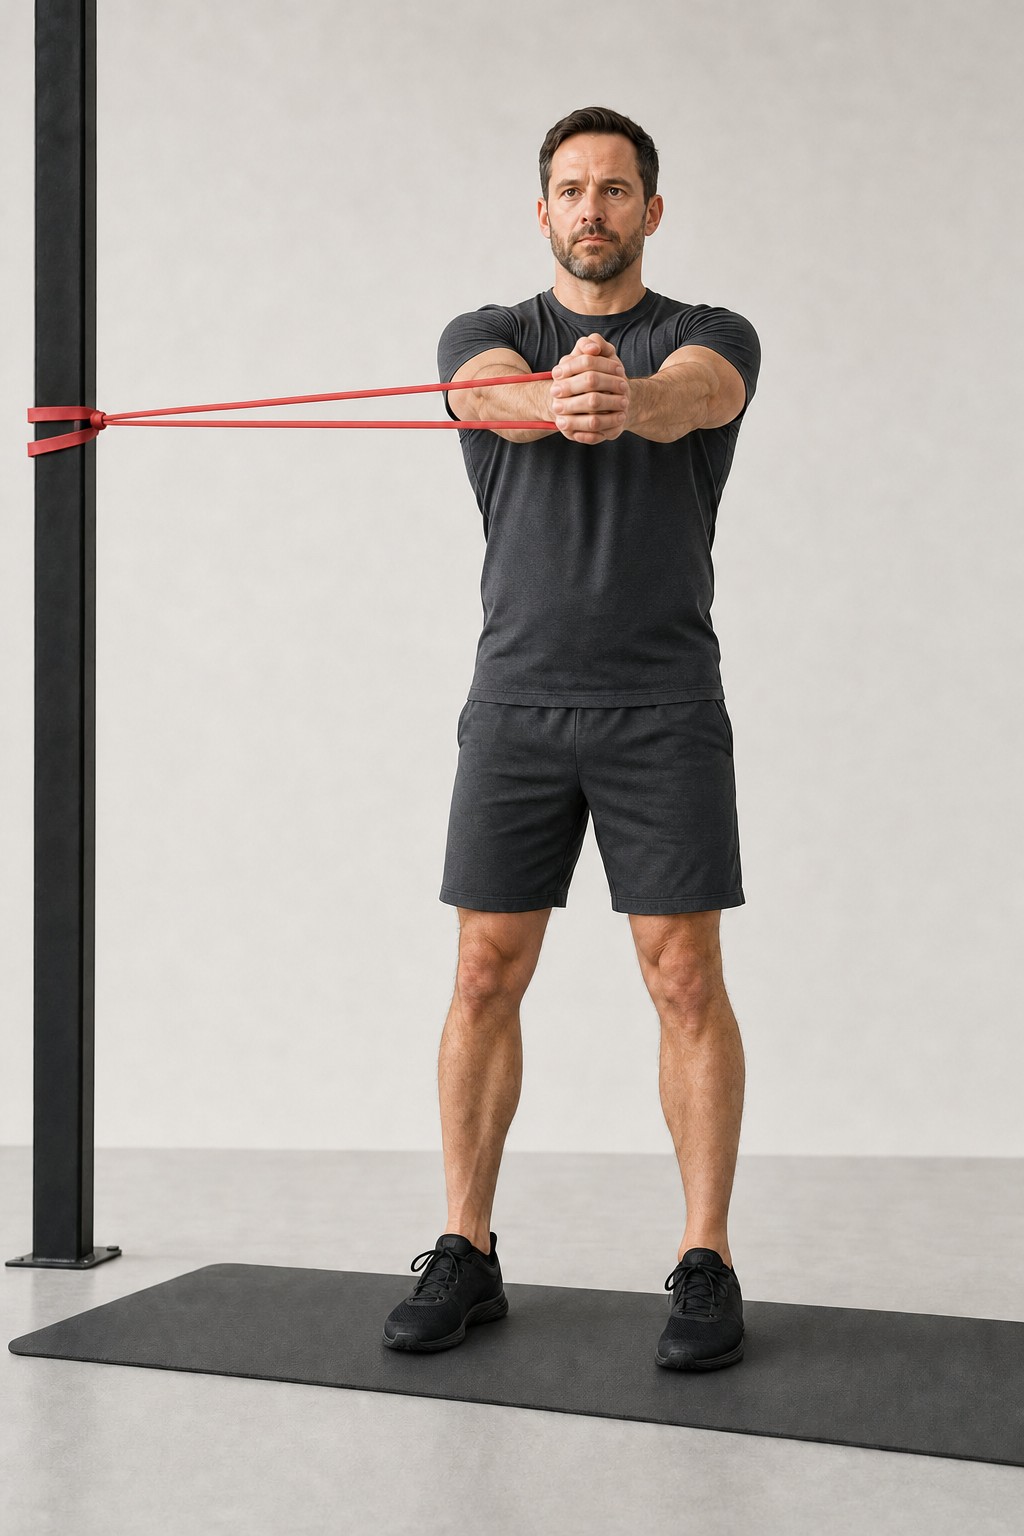
PALLOF PRESS HOLD
PUT IT TOGETHER. Makes it hold while you're standing. HowAnchor a band at chest height (make sure the anchor is solid) and stand side on to it, feet about hip width, knees soft, hands at your chest. Press straight out and hold 5 to 10 seconds without letting the band turn you. Breathe. Bring it back. Switch sides.
Don'tRotate toward the anchor. Stop short of pressing all the way out. Hold your breath.
You should feelYour abs and the sides of your trunk working to keep you square. Working, not maxed out.
FOUR WEEKS.
Two or three days a week, do all four in this order. About fifteen minutes.
- Half Kneeling Hip Flexor Stretch, both sides
- Dead Bug
- Glute Bridge
- Pallof Press Hold, both sides
On the days in between, just the stretch. About five minutes. That gets the stretch in five or more days a week.
The stretch opens the front of the hip. The dead bug teaches your core to hold your pelvis still. The bridge gets your glutes opening the hip. The Pallof press makes it hold while you're standing. That order is the point.
Had hip surgery or a hip replacement? Skip this one and get looked at. Otherwise: a stretch should feel like a stretch, and work should feel like work. If a move hurts more than a little, around a 3 or 4 out of 10, make it easier: less range, slower. At a 5 out of 10, or anything sharp, shooting, numb or tingling, or anything that gets worse over the weeks, stop that move and come get looked at.
TEST AGAIN.
Same bed. Same setup. Pull one knee in, roll back, and look from the side. Is the thigh closer to level? Does the lower leg hang straighter down? Write it down.
MOVE UP.
Move up one move at a time, and only after two sessions in a row where every set felt controlled, the effort was about a 7 out of 10 or less, and nothing went past a 2 out of 10 for pain.
- Hip flexor stretch: move up to the couch stretch.
- Glute bridge: move up to the single leg glute bridge.
- Pallof press hold: move up to the Pallof press step out, then the split stance Pallof press.
YOU'RE DONE WITH THESE.
Pass the test at week four and again at week eight and you've graduated from this block. Keep the four moves in your warm up once or twice a week for another four weeks, then drop them. That's where real strength training takes over, and building that is what our coaches do.
GET LOOKED AT.
No change after two retests, about eight weeks, or it's getting worse: the hip probably isn't the whole story, and that is exactly what an assessment is for.
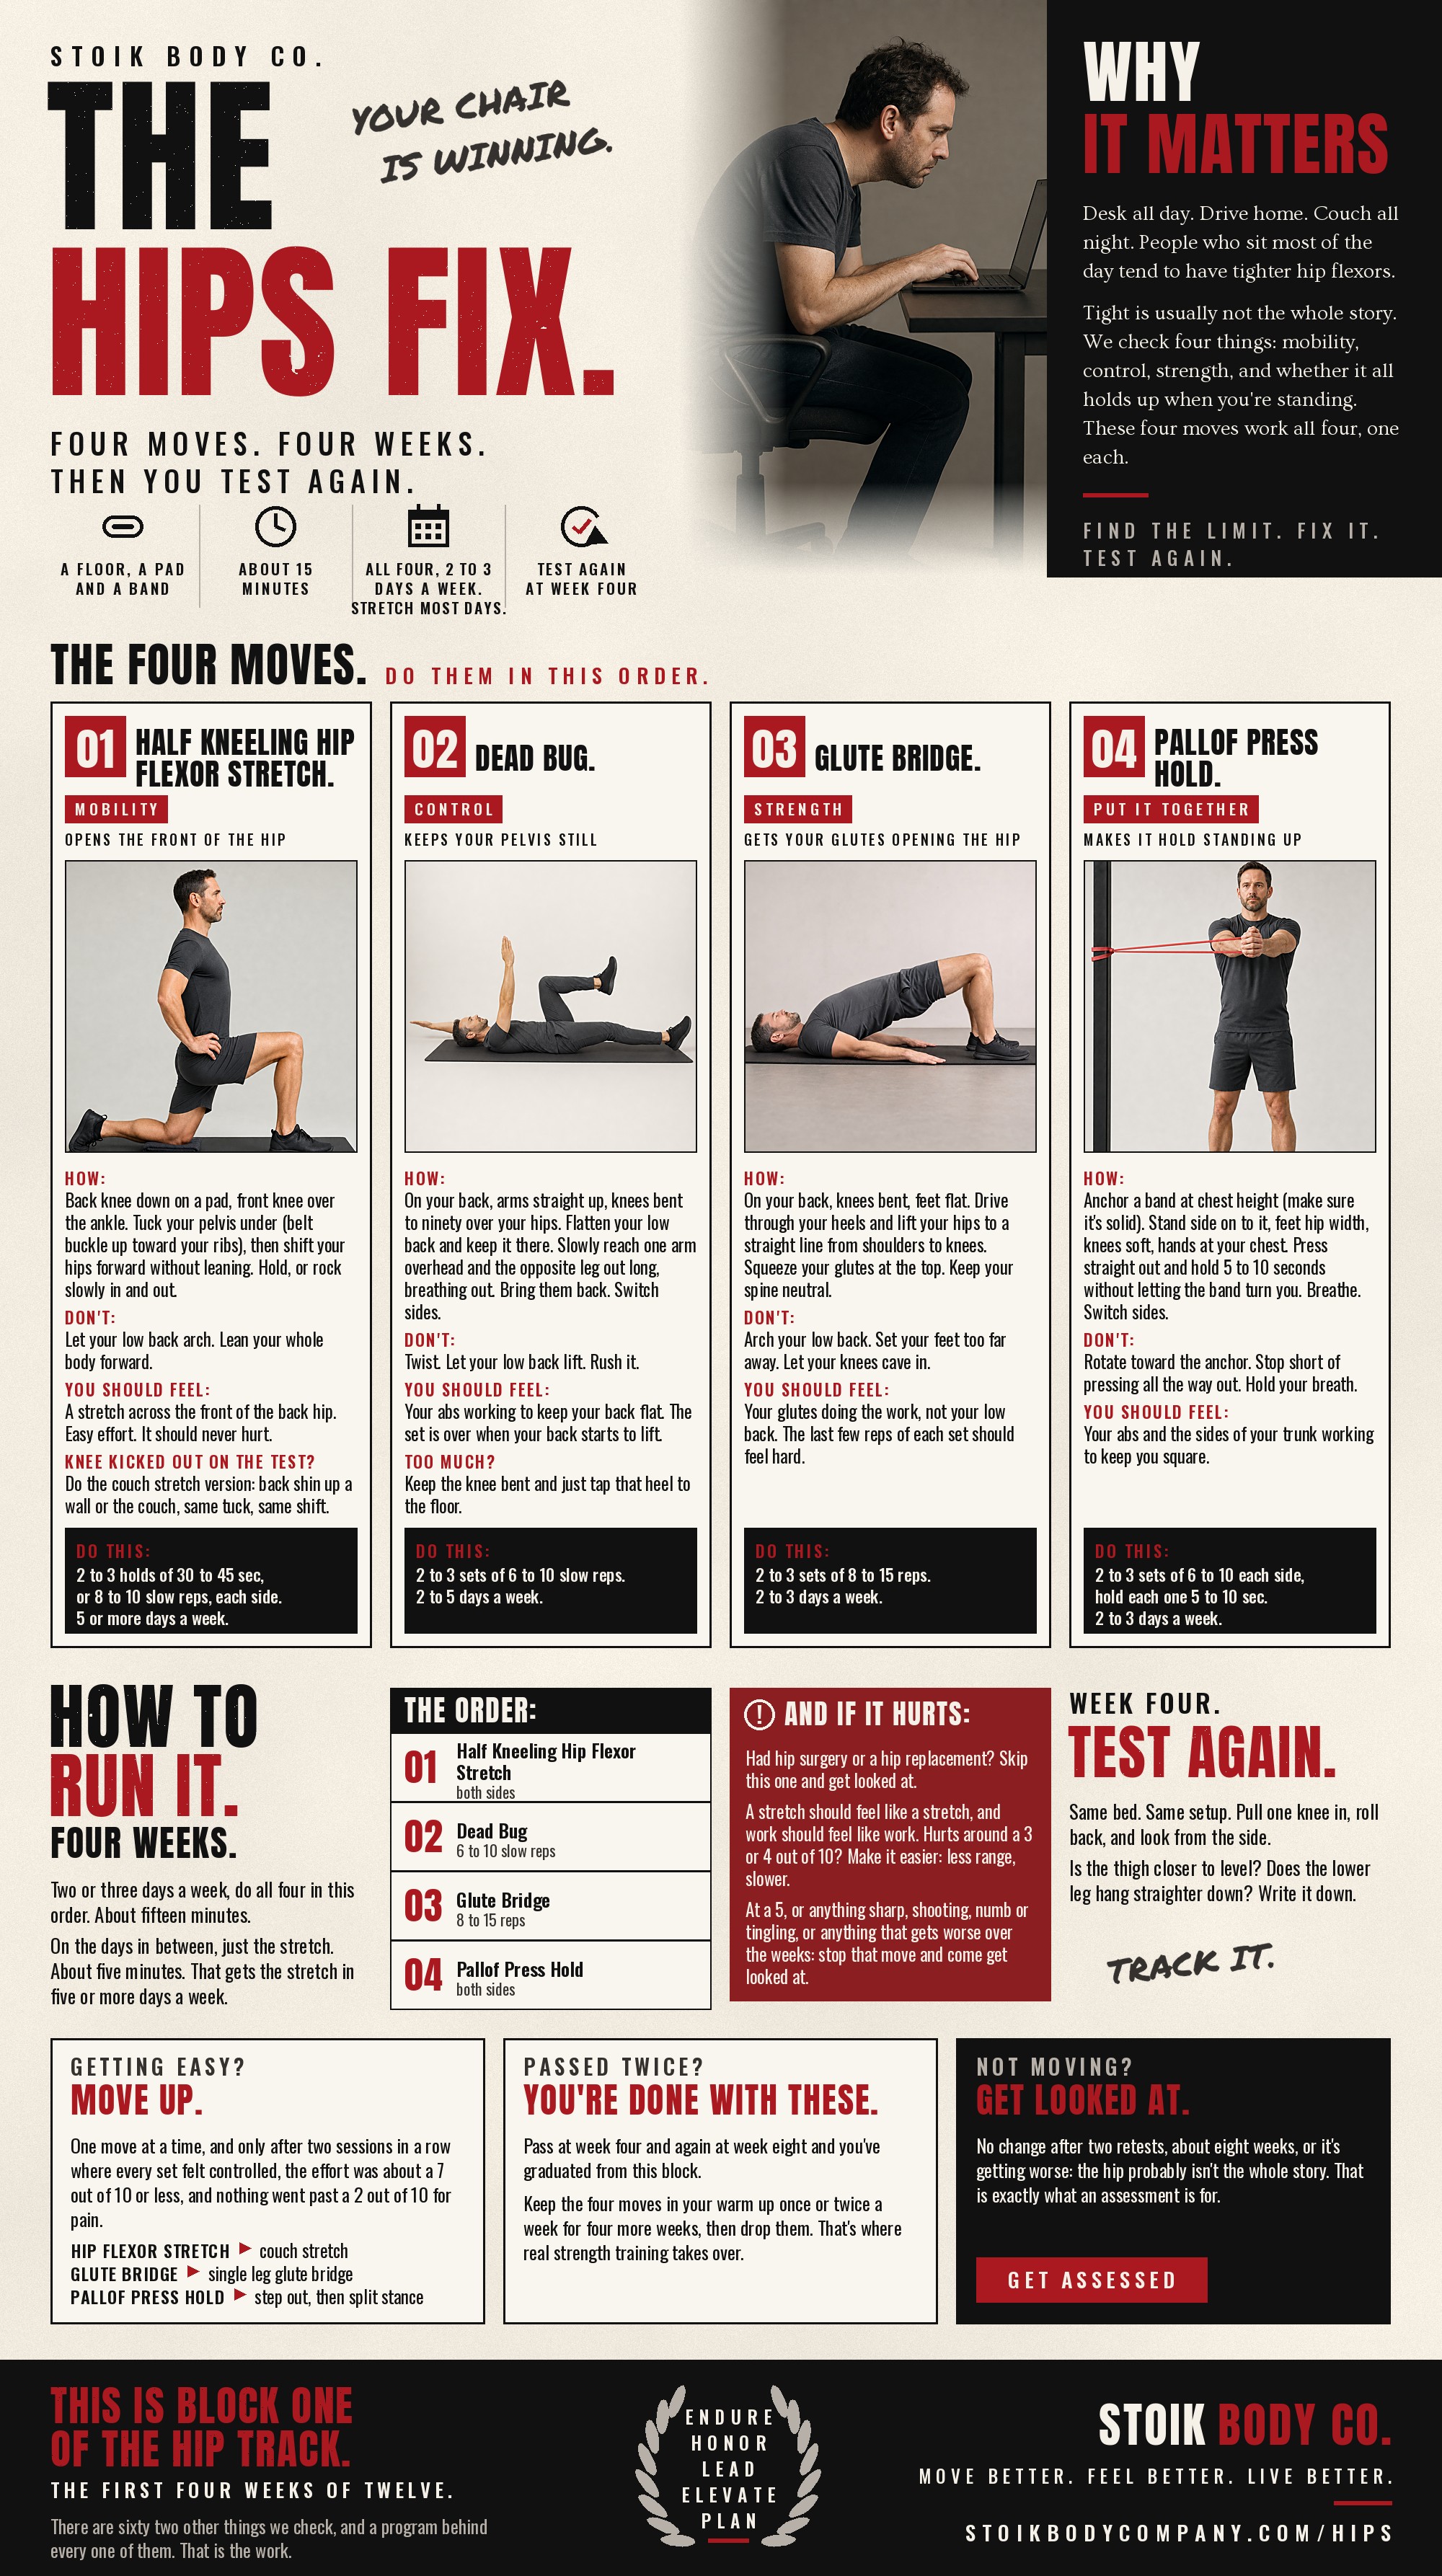
THE WHOLE THING IN ONE PICTURE.
Everything above on a single page. Tap it to open full size, then save it to your phone.
THE FIRST FOUR WEEKS OF TWELVE.
This is block one of the hip track. There are sixty two other things we check, and a program behind every one of them. That is the work.